Quick Start – New Albedo
Setup
- “Start ComfyUI” button:
Click the button to launch ComfyUI.
Generate
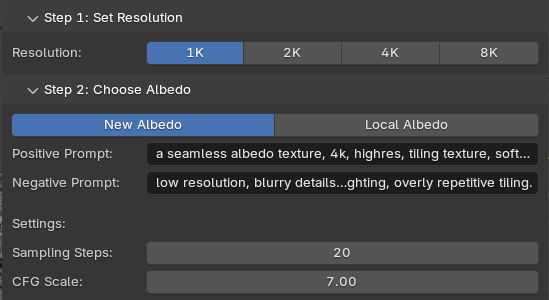
- Resolution
Choose the image resolution. - Prompt
- Prompt
Enter descriptive text for the image you want to generate.
- Negative Prompt
Specify elements you want to avoid in the generated image.
- Prompt
- Settings
- Sampling Steps:
Define the number of steps for refining the image. Higher values result in better quality but increase generation time. - CFG Scale:
Adjust the strength of the prompt’s influence.
- Sampling Steps:
- Use ControlNet
- Enable “Use ControlNet” and input the path to the ControlNet reference image. This image is in color.
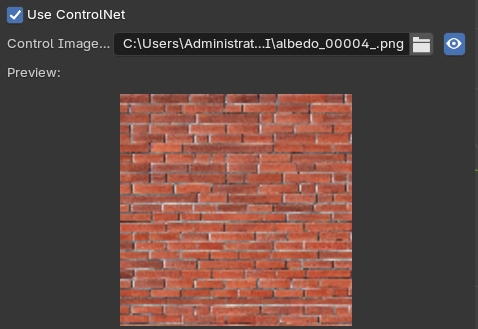
- Click “Generate Albedo” button and choose your preferred albedo map.
- Click “Generate Texture” button
- You can click the Download button to save the current image for adjustments.
- After making your changes, click the Upload button to upload the modified image.

- Click “Create Material” button
- Choose how to apply the material by displaying it on a plane, sphere, or cube.
- Enter material name.
- Shader Edit
- Open the Shader Editor and adjust the following parameters.
- Roughness:
Controls the smoothness and reflectivity of the material’s surface.- Scale
Default value 1.0 - Offset
Default value 0.0 - Randomness
Default value 0.0
- Scale
- Normal:
Defines surface details like bumps and reflection direction through normal maps.- Strength
Default value 1.0 - Scale X
Default value 1.0 - Scale Y
Default value 1.0 - Scale Z
Default value 1.0
- Strength
- Displacement:
Used to change the geometry of the model surface and add a realistic height difference effect.- Midlevel
Default value 0.5 - Scale
Default value 0.03 - Flip
Default value 0.0
- Midlevel
Material Management
- Add
- Preview Area
- Adjust the size of the preview area by dragging the Preview Scale slider at the top of the preview window.
- Select the preview render type on the right side of the preview area.
- Click “Save to Lib” to save the material to the LH asset library.
- Preview Area
- Delete
- Click “Delete from Lib” button. In the pop-up window, select the name of the asset you want to delete and confirm by clicking “OK”.
Stop ComfyUI
- Click the button to terminate the ComfyUI service.